how to use a micrometer
Micrometer Reading, Use, and Measurement
When a pair of calipers just isn't accurate enough (i.e. need to measure a tolerance that is less than 0.002″), most machinists will turn to a Micrometer Reading. Micrometers come in digital, dial, and vernier styles, much like calipers:
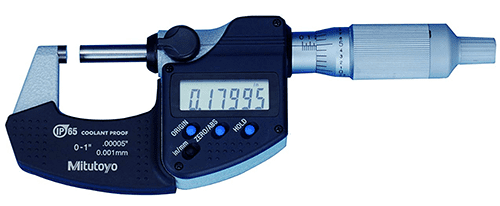
Mitutoyo Digital Micrometer…
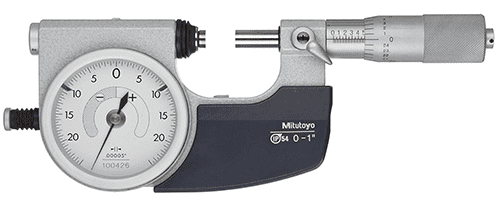
Mitutoyo Dial Micrometer, more properly an Indicating Micrometer…
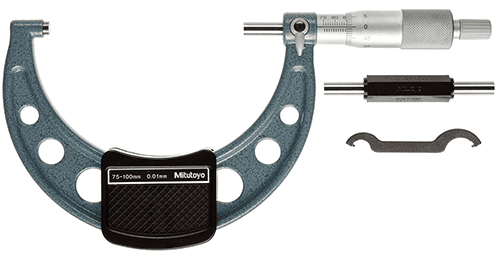
Mitutoyo Vernier Micrometer
Which Kind for Me?
Let's put aside the dial or indicating micrometer style. They're very expensive and you may not even see one outside a well-equipped Metrology Lab. Their purpose is to reduce operator error even more than the ratcheting thimble will. Turn until the dial is zero for the highest repeatability. They also have a quick release button to minimize contact wear. If you really need highly accurate and repeatable measurements, and you need a lot of them, buy an indicating micrometer. But, as I say, they are expensive!
That just leaves digital or vernier. If you can read the vernier quickly, easily, and accurately (it takes a little practice), they're a lot cheaper, more durable, and the battery never goes dead because they don't need a battery.
On the other hand, if you've never learned or gotten comfortable with vernier micrometers, you can get a micrometer reading from a digital at a glance. My preference is to keep digital for the sizes I use the most and I bought a boxed set of vernier mics for larger sizes that I hardly ever use.
Micrometer Sets & Size Ranges
Micrometers work using a precision screw that moves the anvils together or apart. As such they have a fairly limited range of measurements they can take. It's common to have boxed Micrometer Sets so that you can take micrometer readings for a wide range of sizes.
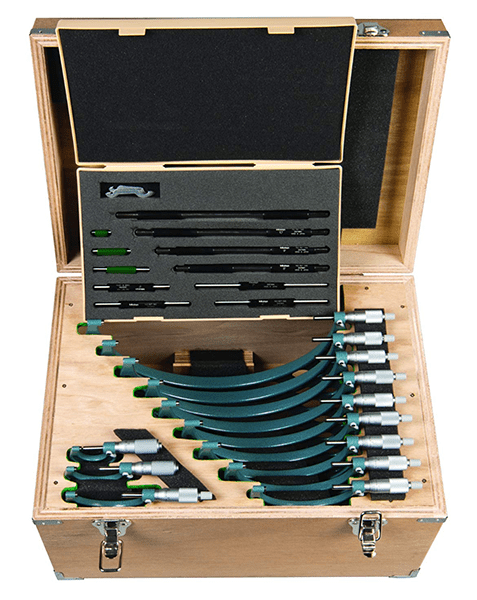
Mitutoyo Vernier Micrometer Set, Sizes 0-12″
Pictured is a set of Mitutoyo Vernier Micrometers with a combined range from 0-12″. A set like this one is quite expensive–$2141.70 on Amazon as I write this.
On the other hand, a somewhat lesser brand like Fowler offers a set from 0-6″ of Vernier Micrometers for just $311.46. For just a little more, you can even get a 0-6″ set of Digital Micrometers. Available on Amazon from iGaging for $395.00.
Reading a Vernier Micrometer
The best way to learn to read a Vernier Micrometer is by watching someone else explain it. Here's a great video from Mitutoyo on micrometer reading for vernier mics:
Extra Credit: Would you like to practice micrometer reading with a vernier mic? Try this excellent simulation:
Virtual Micrometer – Thousandth of Inch Simulator
Micrometer Accuracy
Micrometers are generally considered accurate down to a tenth or 0.0001″. That's about as accurate as any CNC'er needs to measure except on very specialized projects. Something to keep in mind though:
Accuracy below 0.001″ is highly susceptible to temperature issues. Don't carry your micrometer in your pocket–your body heat will warm it up and change the micrometer reading. Be aware of the temps in your shop where you are taking measurements. Consider using a Micrometer Stand (see below) which also helps keep your body heat from affecting the micrometer reading.
Check out G-Wizard's Termal Expansion Calculator (mentioned above) to get an idea of how much temperature can matter. BTW, just sign up for the free trial and you get to keep and use many of the calculators, including the Thermal Expansion Calculator, for life.
Micrometer Stand
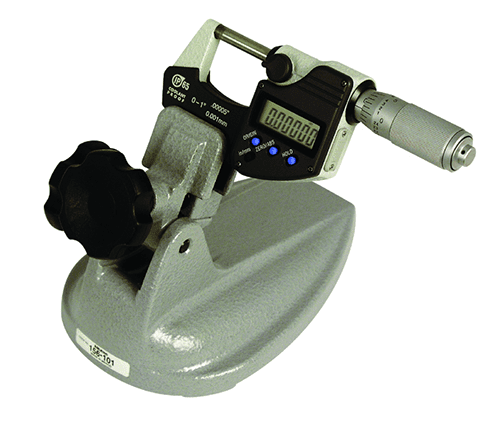
A Micrometer Stand can lead to more accurate measurement. It avoids transfering your body heat to the Micrometer, and makes it easier to take a measurement without juggling.
How to Use a Micrometer (Ratchets for the win!)
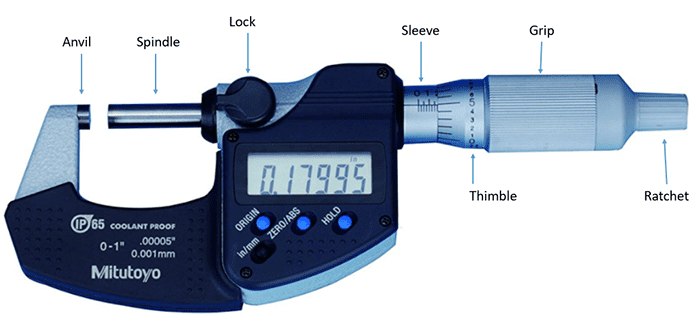
We saw above how to read a Vernier Micrometer. Aside from that skill, the two key things about using a micrometer are keeping the object you're measuring parallel to the anvils and applying even consistent force to the micrometer when you take the measurement.
Just like Calipers, you can force the measurement by applying too much torque to the micrometer. One way to ensure consistent measurements is to get a Ratchet Thimple. This is a little built-in torque wrench. Turn the little ratchet handle that sticks out of the main handle until it clicks a few times and you'll be taking your measurement with the same torque every time.
Micrometer Standards & Micrometer Calibration
Given the level of precision most Micrometers bring, they need calibration to ensure their accuracy. Accurate Calibration is so important that there is an actual standard describing how it should be done.
Here's generally how to calibrate a Micrometer:
- Make sure everything is working well with no binding or other problems.
- Clean the mic anvils
- Close it up, zero it, and make sure it reliably returns to zero.
- Now check the micrometer at various test points using gage blocks or other standards that are known to be highly accurate.
- For each test point, clean your gage blocks so there can be no debris or dust trapped between the block and the mic.
- Take several readings for each test point. Verify the micrometer repeats within the spec of its tolerance (e.g. 0.00005″). Note the measurements on a test sheet that gives length, tolerance, measured length, and error.
- You should also check the flatness and parallelism of the anvils. Use a small sphere, or the stylus of a digital probe. Set zero with the sphere in the center of the anvil faces and zero. Move the ball around the measuring faces and see how the zeroed measurement changes. It must stay within the micrometer's tolerance.
Larger micrometers come with Micrometer Standards. These are precision rods that are great for zeroing on the shop floor. They're not recommended for actual calibration because they're not accurate enough.
Pictures are worth a thousand words, so here is a great video from Mitutoyo on calibrating your micrometers:
Most micrometers include a small spanner wrench that can be used to set the device to zero if it isn't reading zero when fully closed (perhaps on a standard for larger mics)
Micrometer History
Interestingly, the first micrometer-like devices go all the way back to the 17th century where William Gascoigne used them to measure distances between stars and also to determine the relative sizes of various celestial bodies. It wasn't until the early 19th century that Henry Maudslay built the first bench micrometer to serve as the final judge of measurement and accuracy.
By 1844, the details of Whiteworth's workshop micrometer were published, and it sounds very similar to modern micrometers. It had a cast iron frame and steel cylinders that opposed. One was driven by a precision screw and a dial that allowed measurements to a ten thousandth of an inch. By 1867 Brown & Sharpe was mass producing them, which allowed the average machine shop to greatly increase the accuracy of their measurements.
Special Types of Micrometer
Outside Micrometer
The most common micrometers, and the ones we've been discussing above are Outside Micrometers. They measure outside dimensions.
Micrometer Head
You may encounter a Micrometer Head that is part of some other instrument, or not attached to a frame. This is common. They're useful as precision adjustments and stops, and as components in more complex equipment.
Inside Micrometer
Just as calipers can be used to measure inside dimensions, you can purchase micrometers set up for it. They're called inside micrometers:
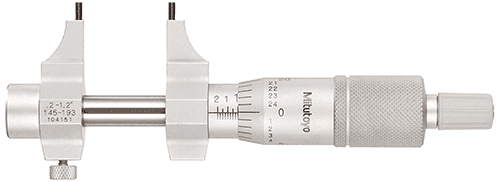
Mitutoyo 0.2-1.2″ Inside Micrometer, Caliper-style. About $216.95 on Amazon.
The two little tips sticking up are round.
The one pictured is the "Caliper-Style." You can also get Tubular Inside Micrometers.
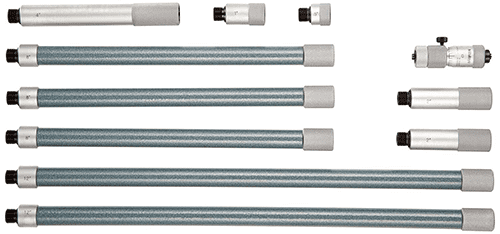
Tubular Inside Micrometers are less commonly seen, but handy for larger openings.
Blade Micrometer
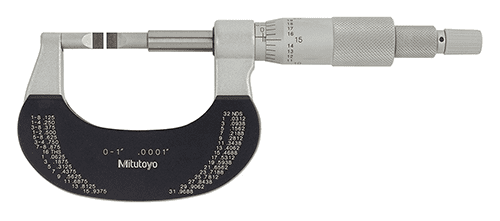
Blade Micrometers can be used to measure the outside dimensions of grooves.
Groove Micrometer

Here's an odd beast, but where there's a tolerance there will be a corresponding measuring device. The Groove Micrometer uses concentric rods that have discs affixed. Put one disc in each groove or perhaps one in a groove and one in an outside edge or face and you can measure how far apart they are with great precision.
Micrometer Depth Gage
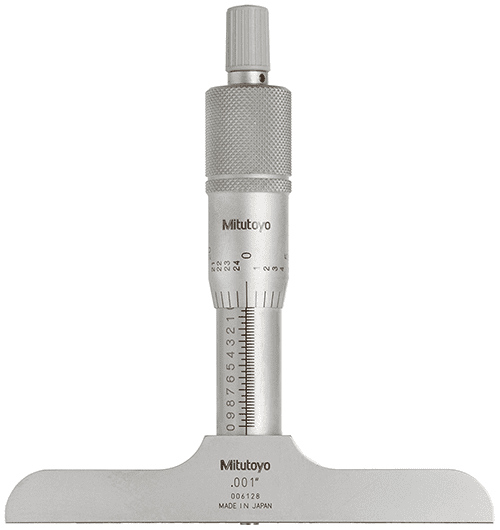
We saw in the section on Calipers how they have a depth gage feature. It should come as no surprise that when there's a need for more accurate depth readings, there is a micrometer to the rescue: introducing the Micrometer Depth Gage.
Bore Measuring Micrometer (Bore Micrometer)
Bores are such a science unto themselves, I will wait until the bore measuring section to talk about Bore Micrometers.
Screw Thread Micrometer: See Metrology / Thread Measuring Tools
[ Return to Our Complete Metrology Guide ]
Join 100,000+ CNC'ers! Get our latest blog posts delivered straight to your email inbox once a week for free. Plus, we'll give you access to some great CNC reference materials including:
how to use a micrometer
Source: https://www.cnccookbook.com/micrometer-reading-use-measurement/
Posted by: pattersonwirciang.blogspot.com

0 Response to "how to use a micrometer"
Post a Comment